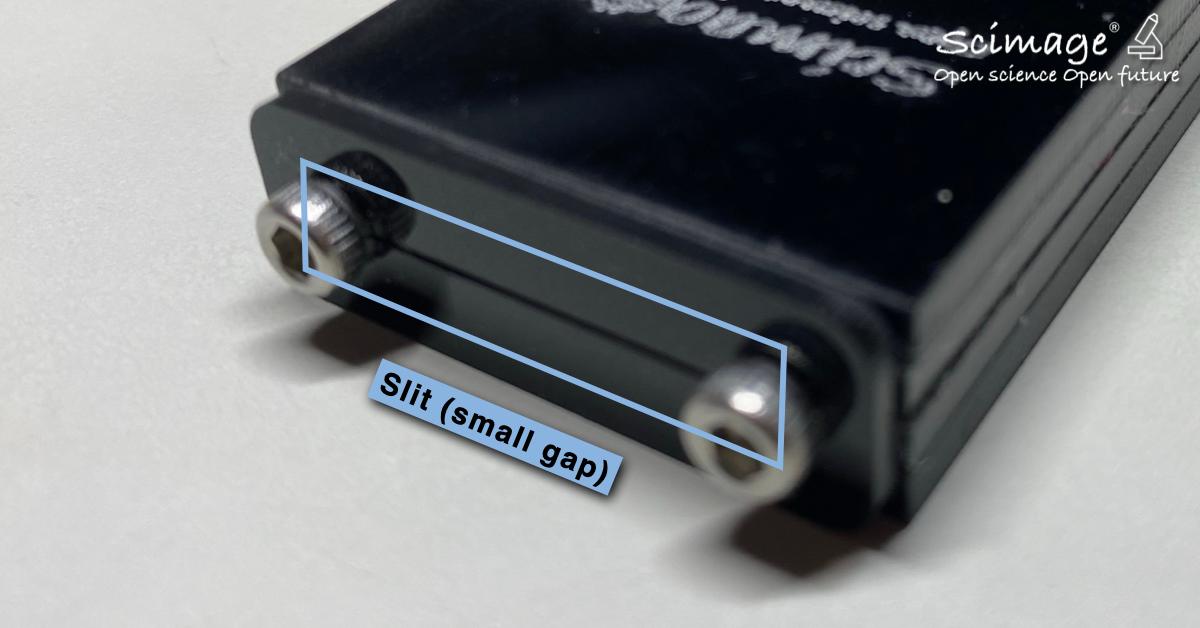
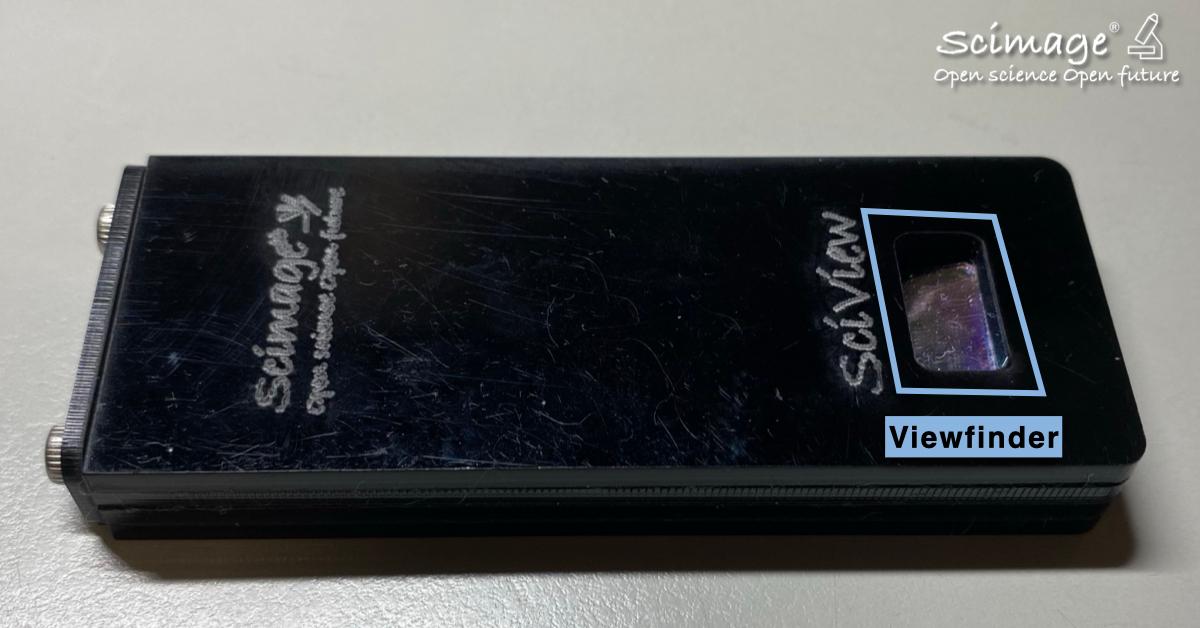
Simply align the smartphone spectrometer's slit (small gap) with the light source, then point your camera at the viewing window (rectangular frame) to capture beautiful spectra. While this shooting method seems simple, it actually contains many nuances. How to capture a good 'spectrum' is the focus of this article.
I. Shooting Methods
The smartphone spectrometer has multiple observation methods. After aligning the slit (small gap) with the light source, you can observe directly with your eyes or use different photography tools at the viewing window to capture spectra, such as smartphones, webcams, or USB cameras.

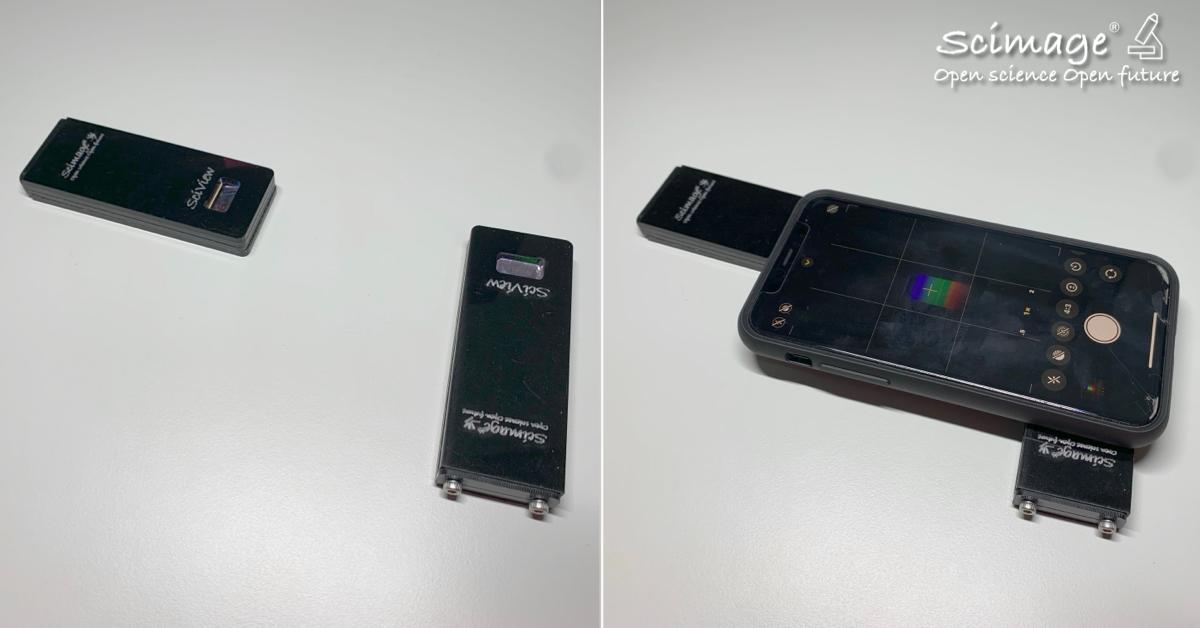
(1) Handheld Shooting
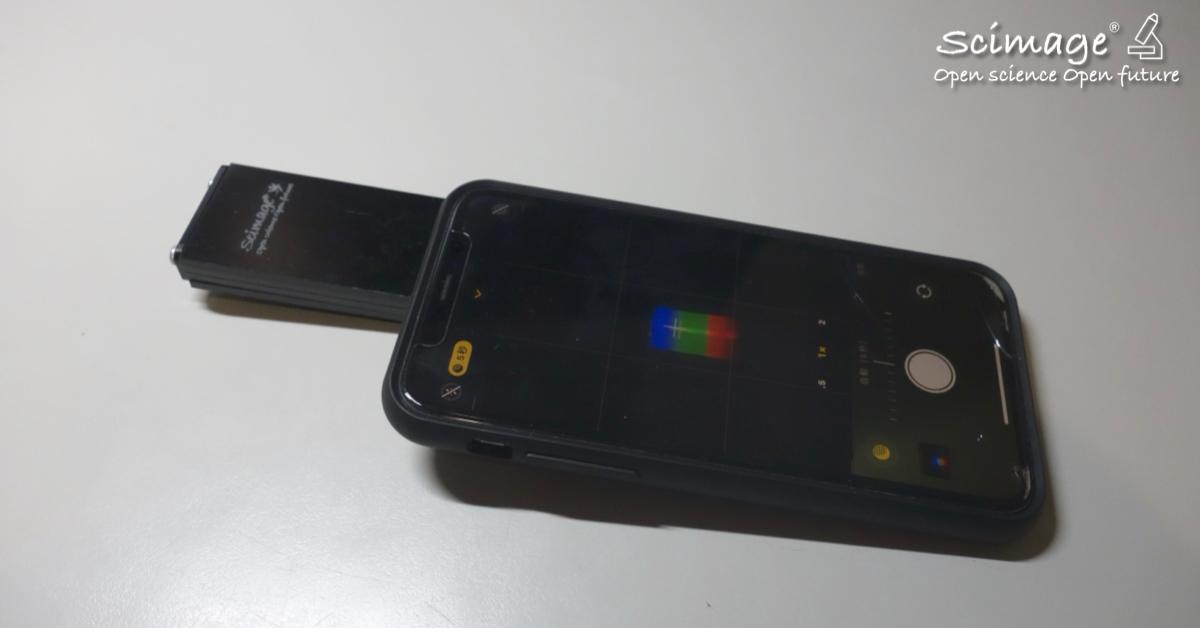
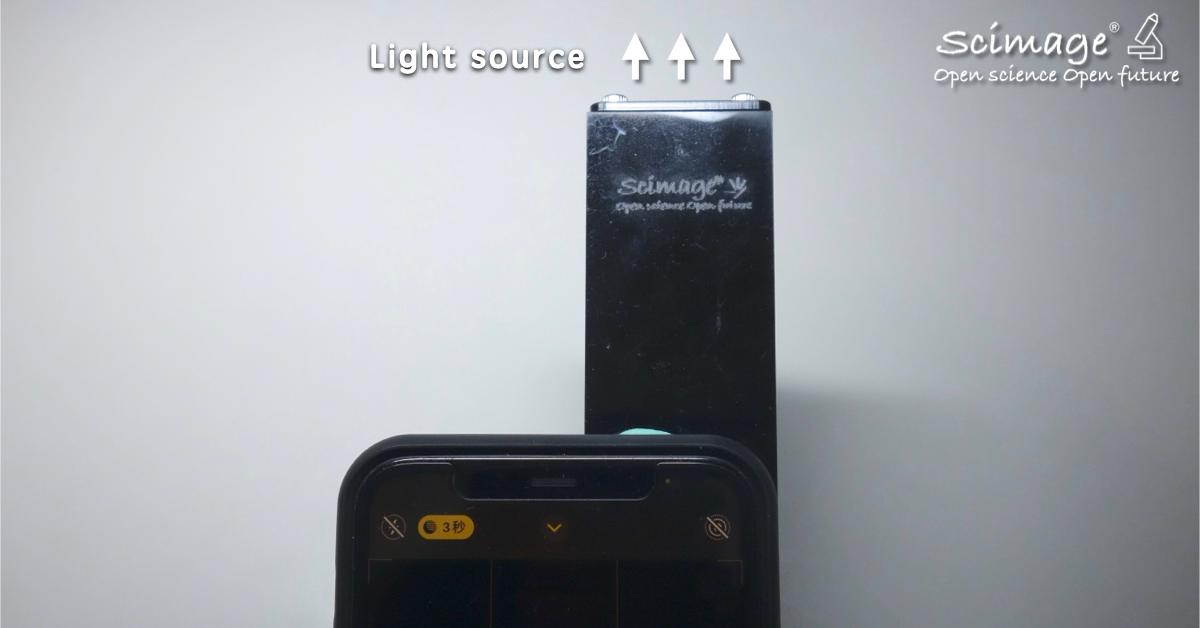
As the name suggests, hold the smartphone spectrometer in your hand, align the slit (small gap) with the light source, then bring the phone camera close to the window to capture the spectrum. This method allows you to quickly identify the spectra of different light sources. The smartphone spectrometer is very lightweight and portable, so when you see various light sources while out and about, you can take out the smartphone spectrometer to observe their mysteries.
The disadvantage of handheld shooting is that without other small tools for assistance, there are often problems with light leakage, overexposure, or shooting angles causing secondary reflections. Getting the perfect angle with handheld shooting requires a lot of practice.
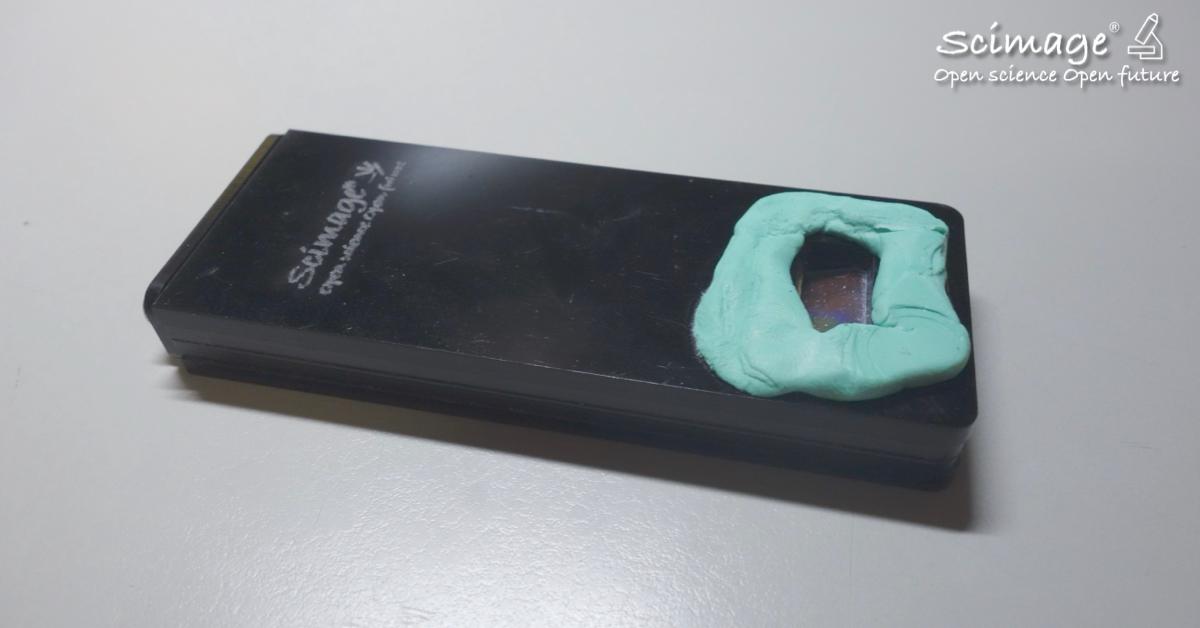
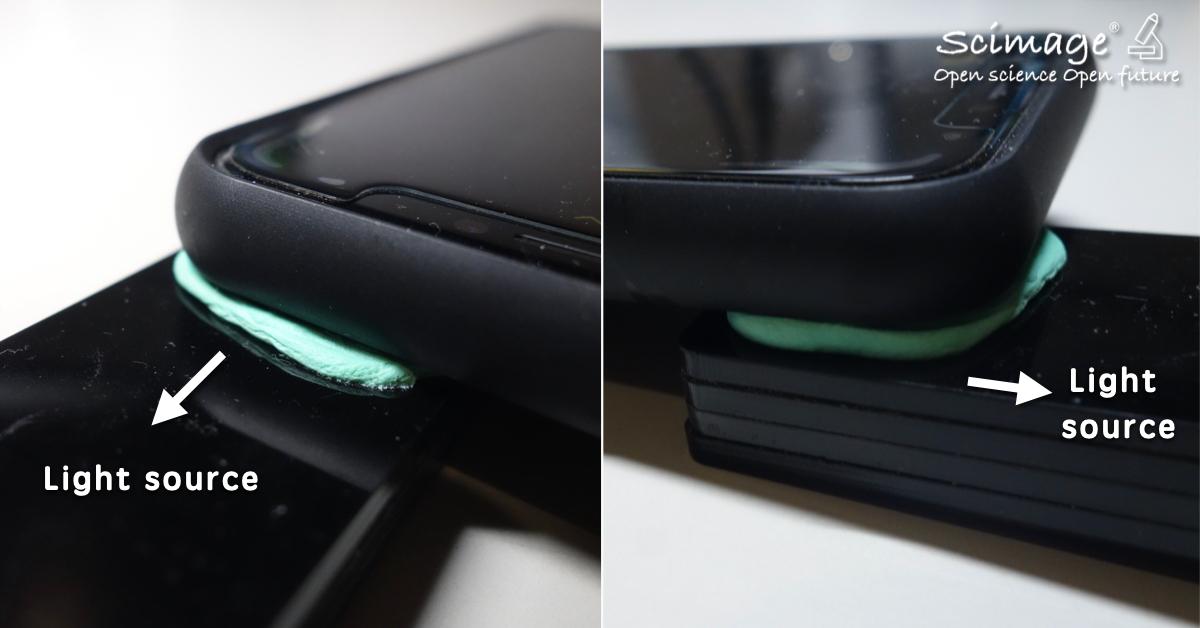
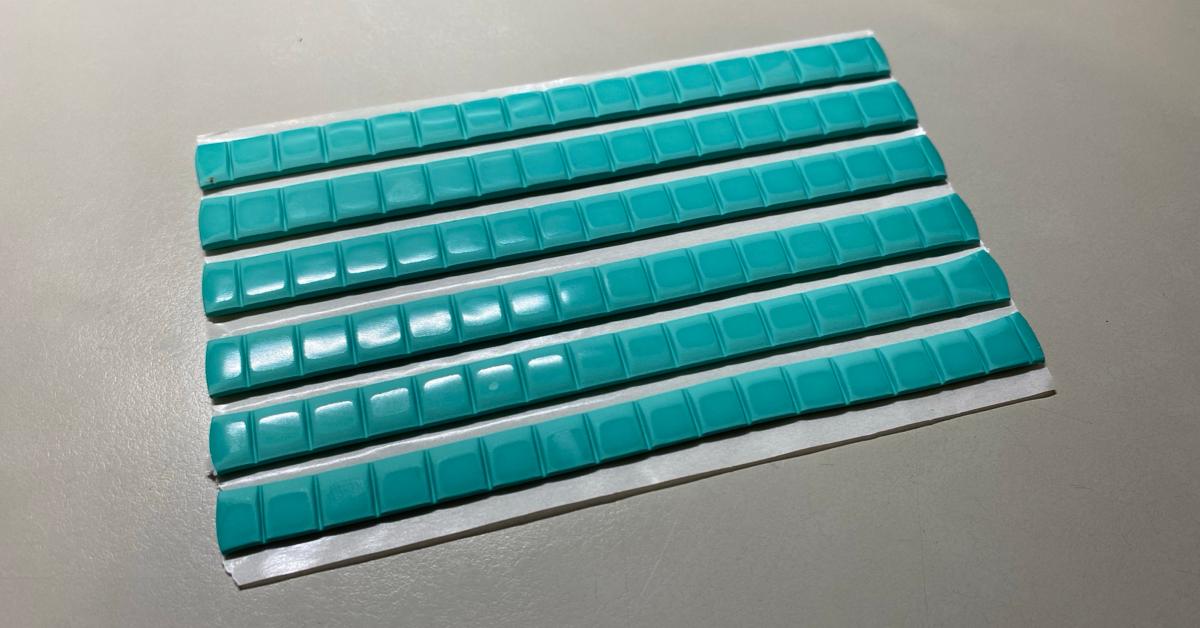
A. Using a lot of putty to attach to the phone camera
This method can effectively reduce light leakage and firmly secure the phone and smartphone spectrometer, making it very convenient for handheld use.
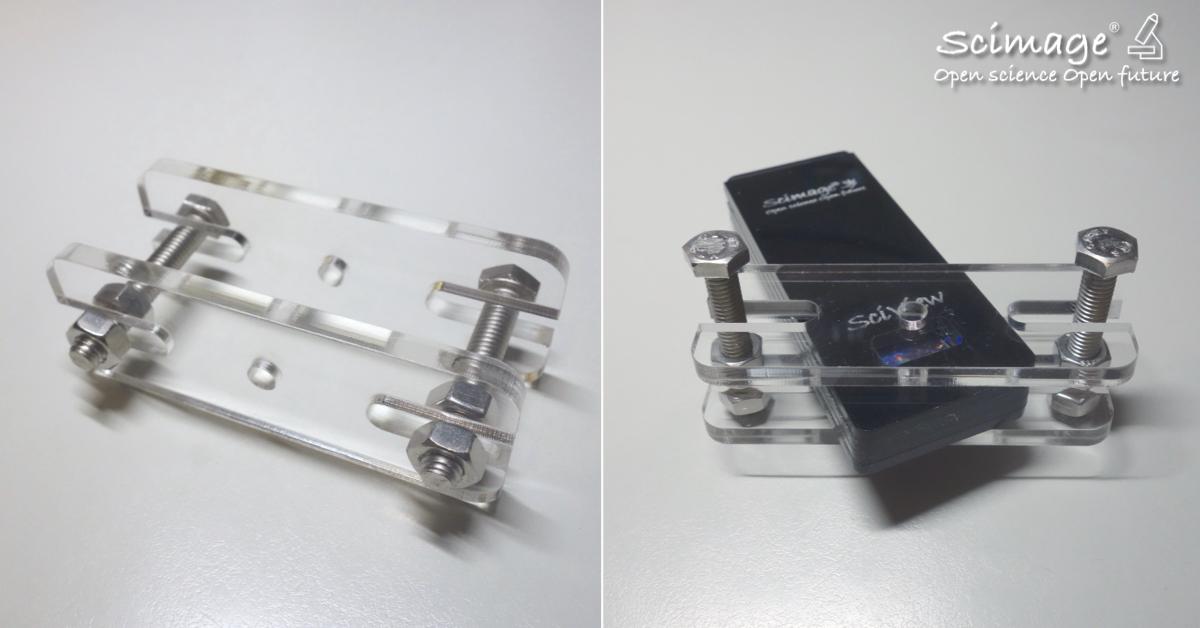
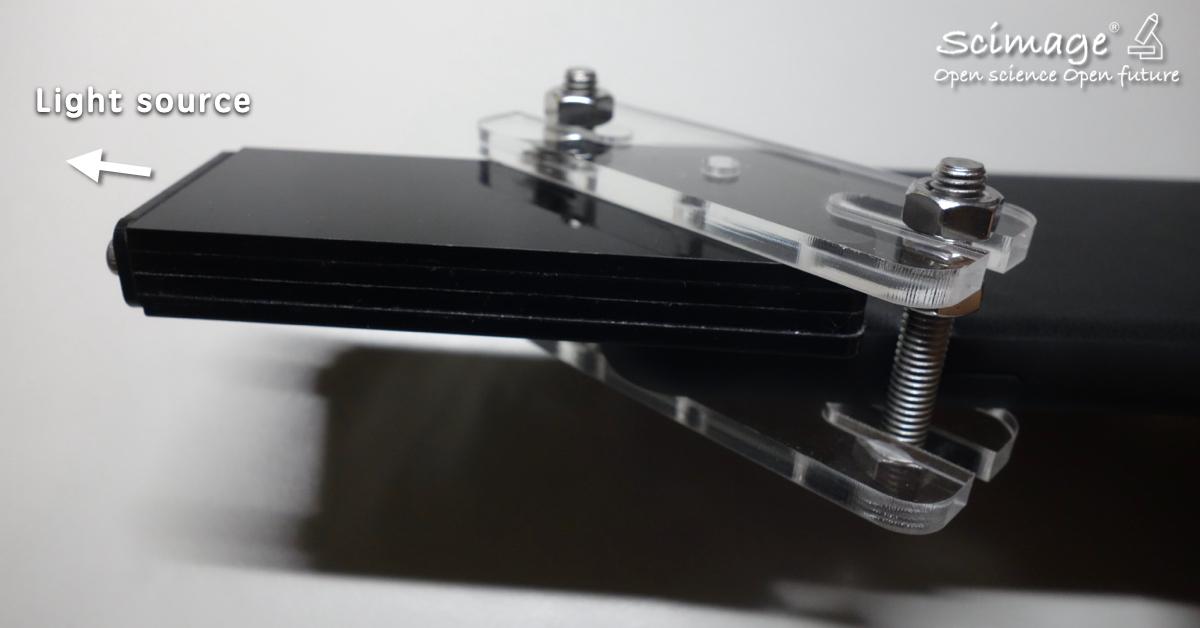
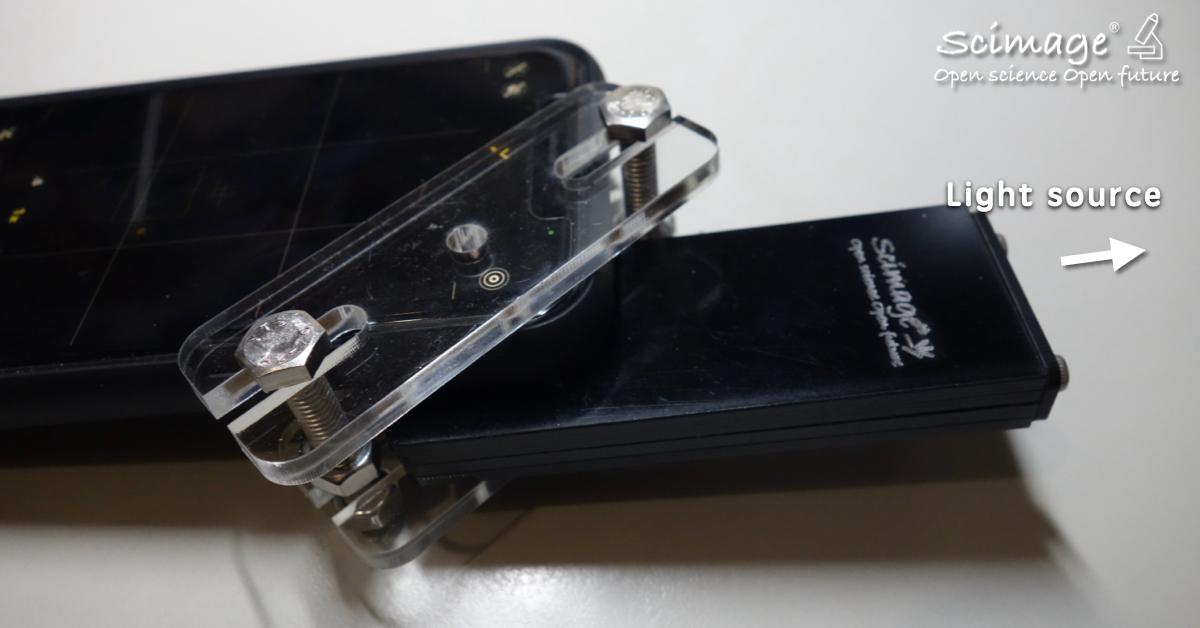
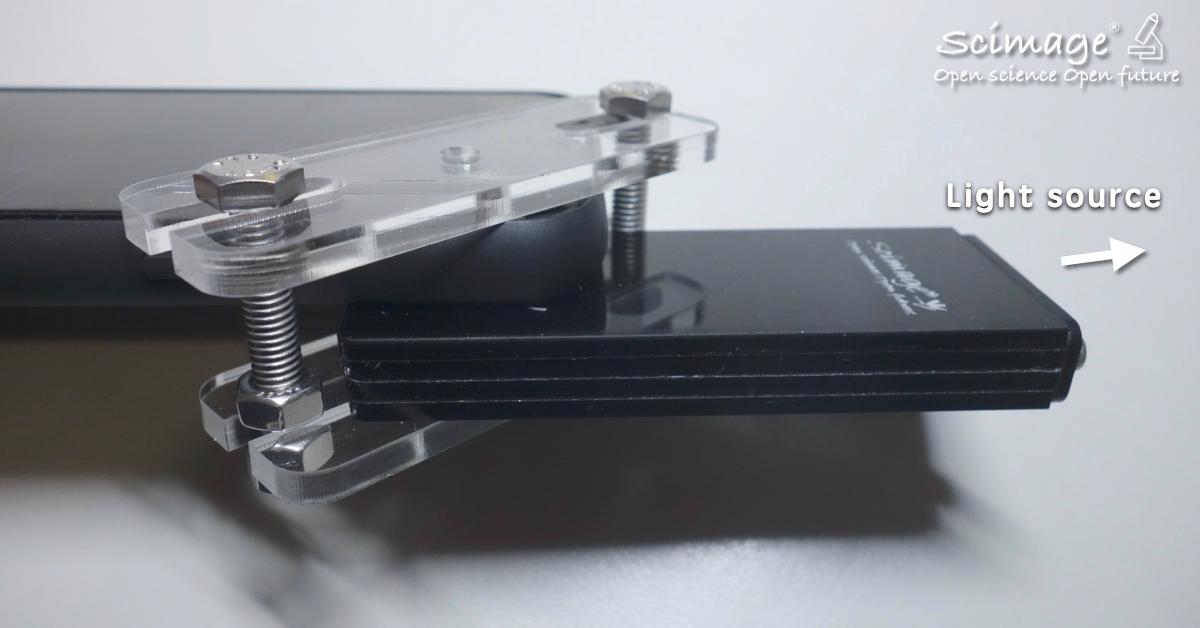
B. Using H-plate for fixation
This method was shared by Wang Xiaofa. If you don't have putty on hand, you can also use H-plates, screws, and nuts to tightly secure the phone and smartphone spectrometer.
(2) Fixed Position Shooting
Unlike handheld shooting, fixed position shooting can reduce many shooting difficulties. Here are several common fixation methods:
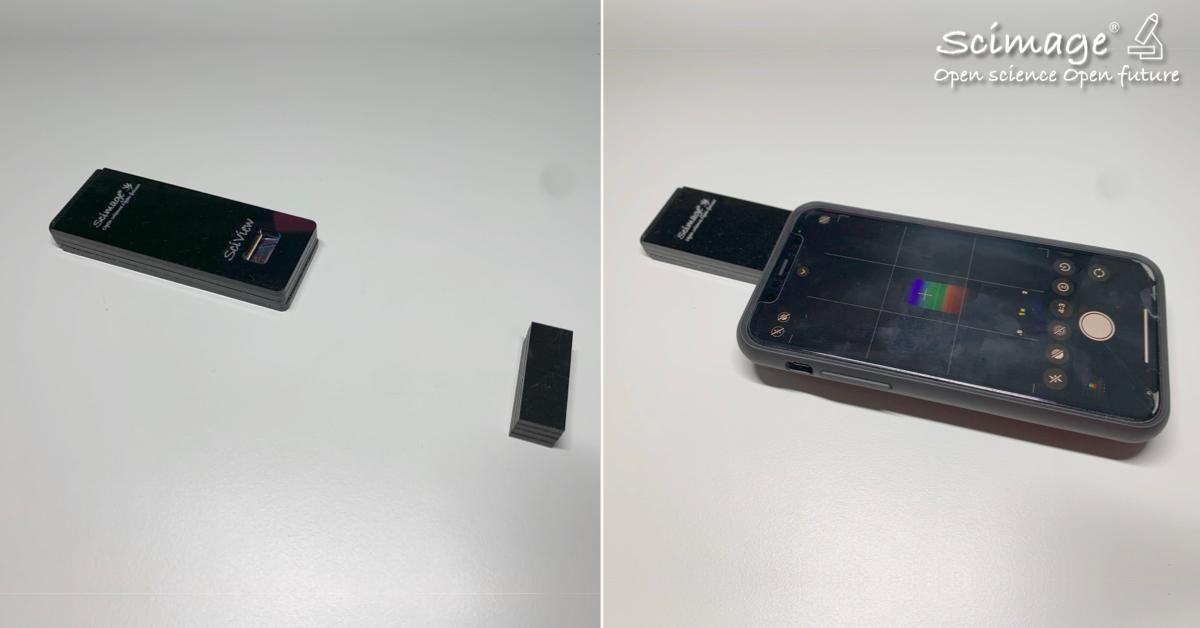
A. Using small black blocks for auxiliary fixation
The small black blocks are the same height as the smartphone spectrometer. If you have received small black blocks, you can use them to support the phone, increasing stability when placed flat on the desktop.
B. Using a second smartphone spectrometer for auxiliary fixation
This has the same effect as the small black blocks. Since both smartphone spectrometers are the same height, they can be used to mutually support the phone, making spectrum shooting much more stable.
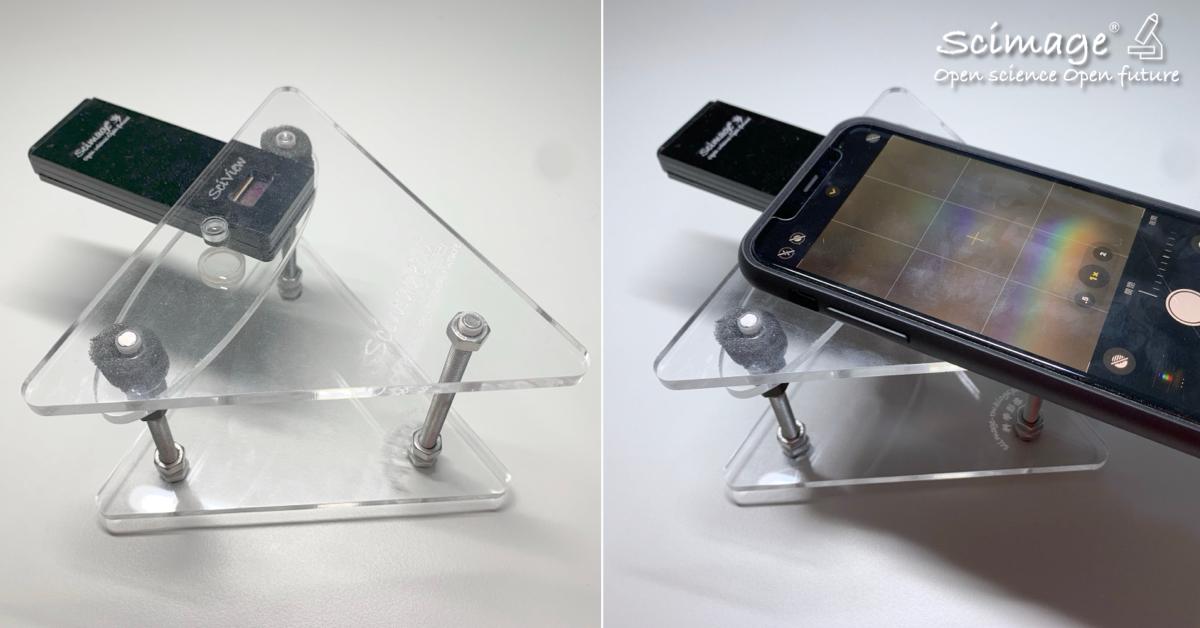
C. Using smartphone microscope for auxiliary fixation
If you have a smartphone microscope (standard upright) nearby, you can use the stage to clamp the smartphone spectrometer. Compared to placing it flat on the desktop, the stability after clamping is greatly improved, and the lens can directly pass through the upper triangular plate to shoot the spectrum.
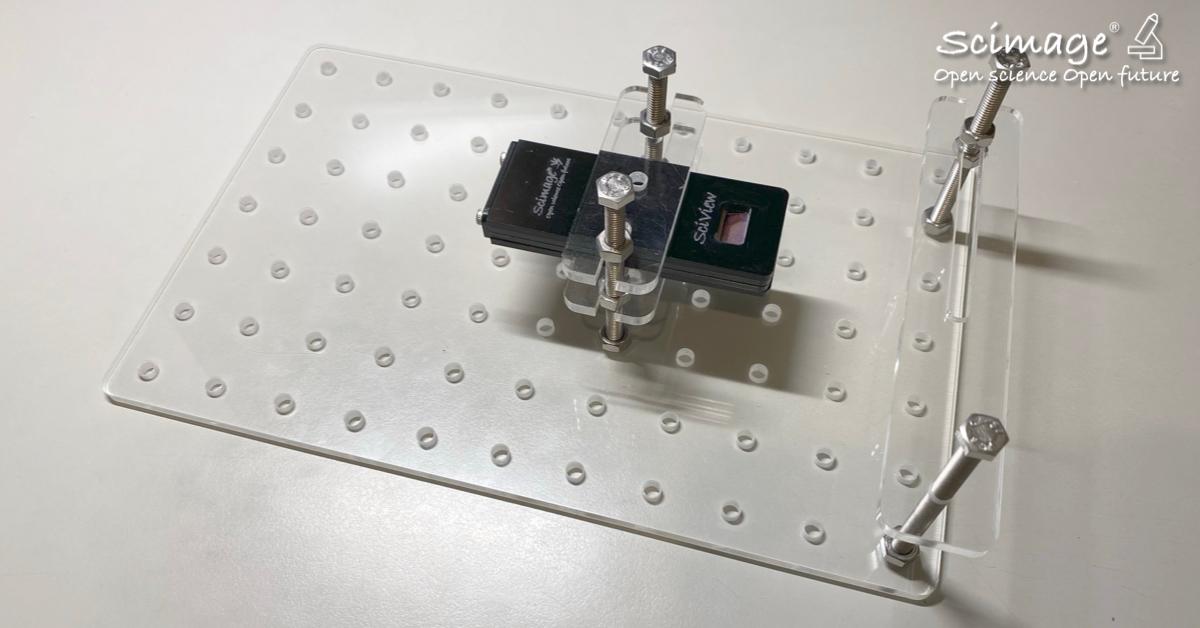
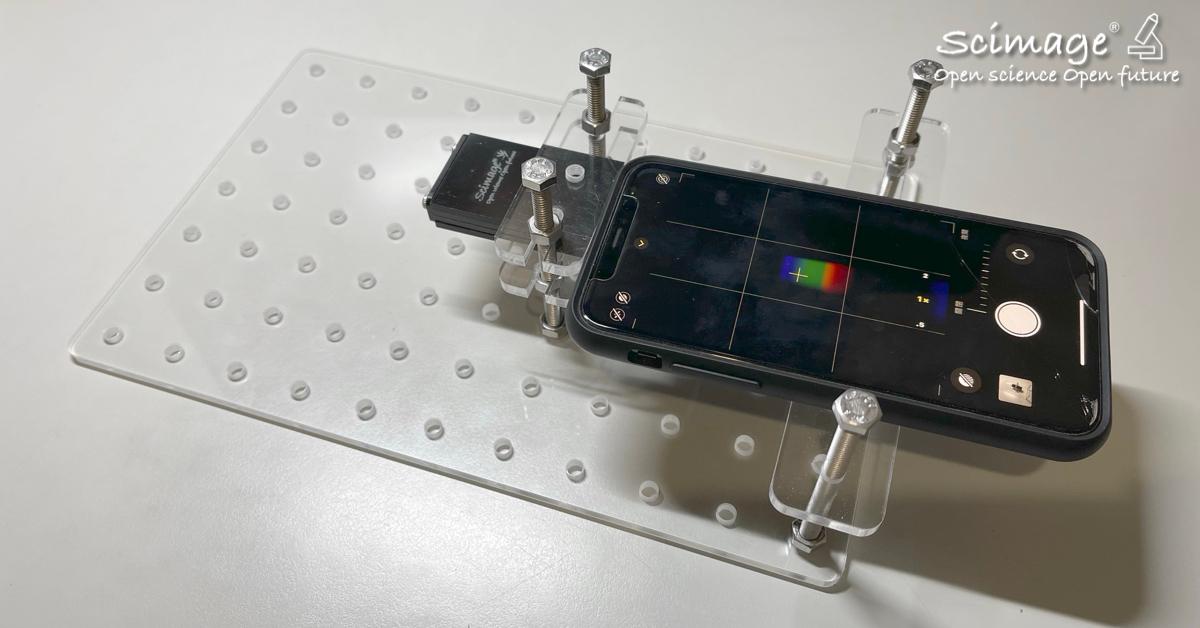
D. Using optical table for auxiliary fixation
An optical table has 77 holes. When received, it is not threaded (meaning no threads), so screws cannot be locked in. You need to use a 'torque wrench with tap' to thread it yourself (pay attention to level).
The optical table has the same effect as the smartphone microscope, firmly securing the smartphone spectrometer and improving stability during photography. Compared to the clamp-type smartphone microscope (standard upright), the optical table has greater flexibility, not only for smartphone spectrometers but also for various different scientific instruments.
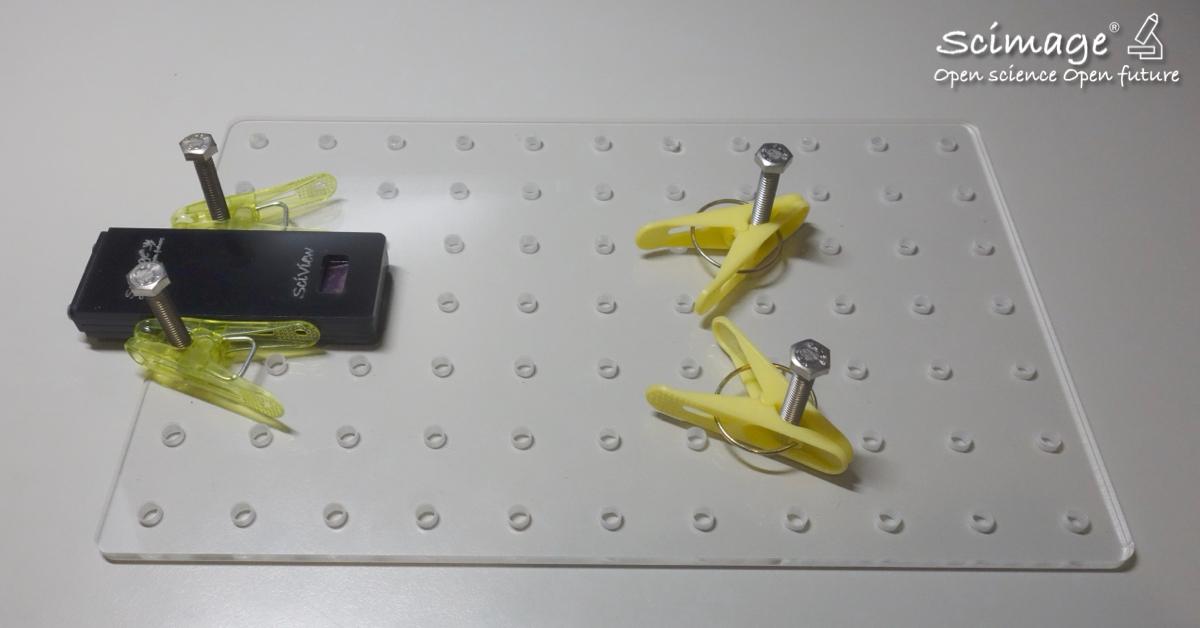
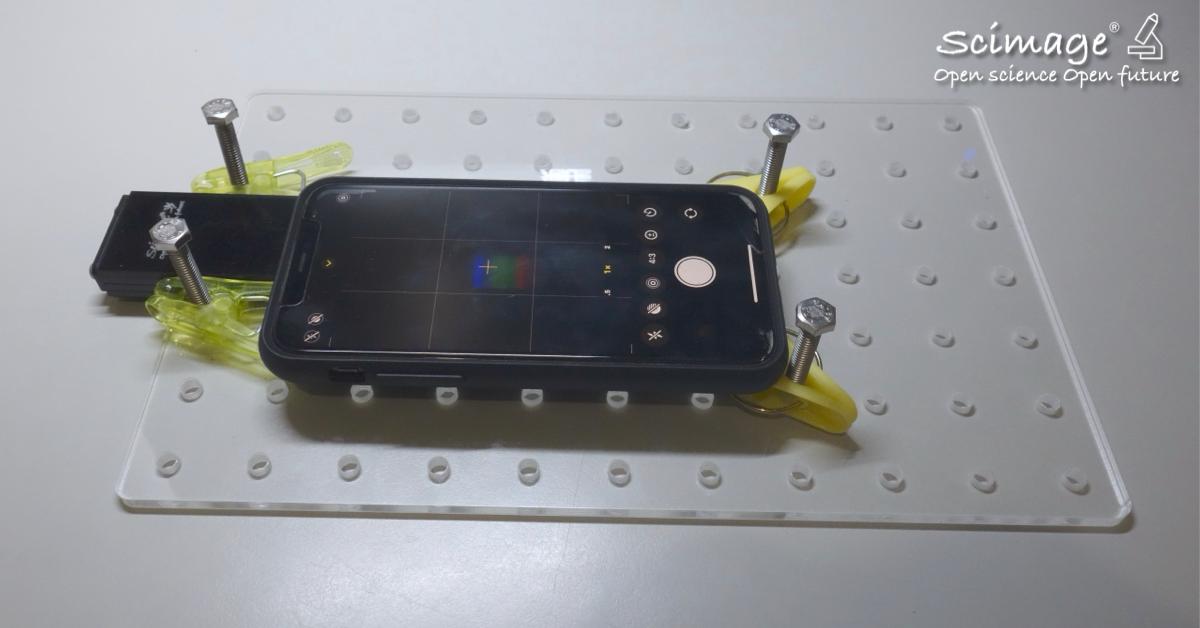
E. Using pegboard and clothespins for auxiliary fixation
This method was provided by Teacher Bill Yang. Optical tables and science building blocks are available for free sponsorship registration, usually once every two years. Besides waiting for open registration, participating in collaboration at science factories also provides opportunities to obtain them.
To provide everyone with more options, Teacher Bill Yang came up with a clever solution: go to a certain Japanese chain store and buy clothespins to match with pegboard, achieving the same effect.
II. Common Shooting Problems
(1) Light Leakage
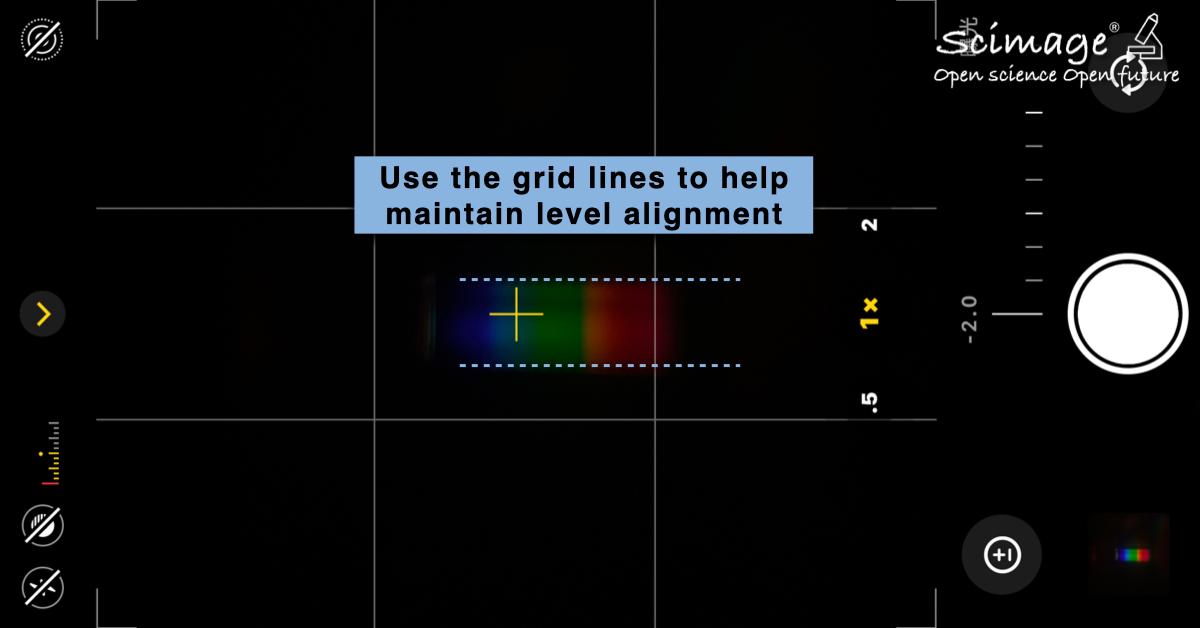
During normal shooting, there should only be one colored spectrum in the middle. If there are colors on all sides (up, down, left, right), it's likely caused by light leakage. To avoid light leakage, the phone camera should maintain a tight connection with the smartphone spectrometer's viewing window. Sometimes phone cases can become a major obstacle to shooting.
To reduce light leakage, you can use 'putty' to stick around the viewing window, or stick it around the phone case and smartphone spectrometer in a complete circle, which can effectively reduce light leakage.
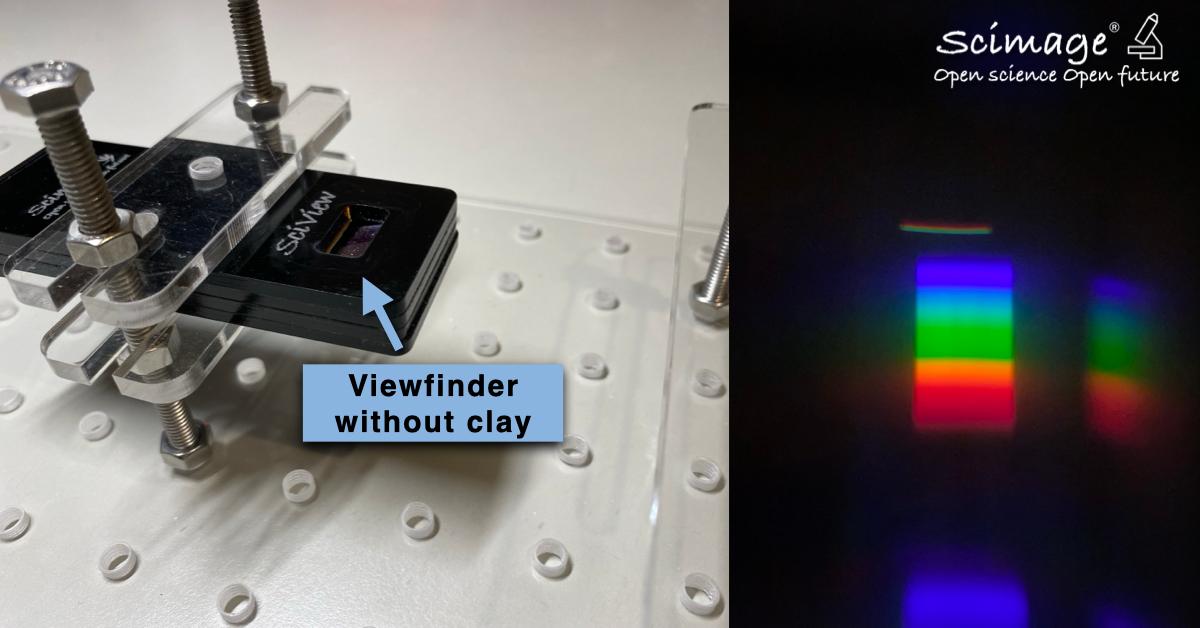
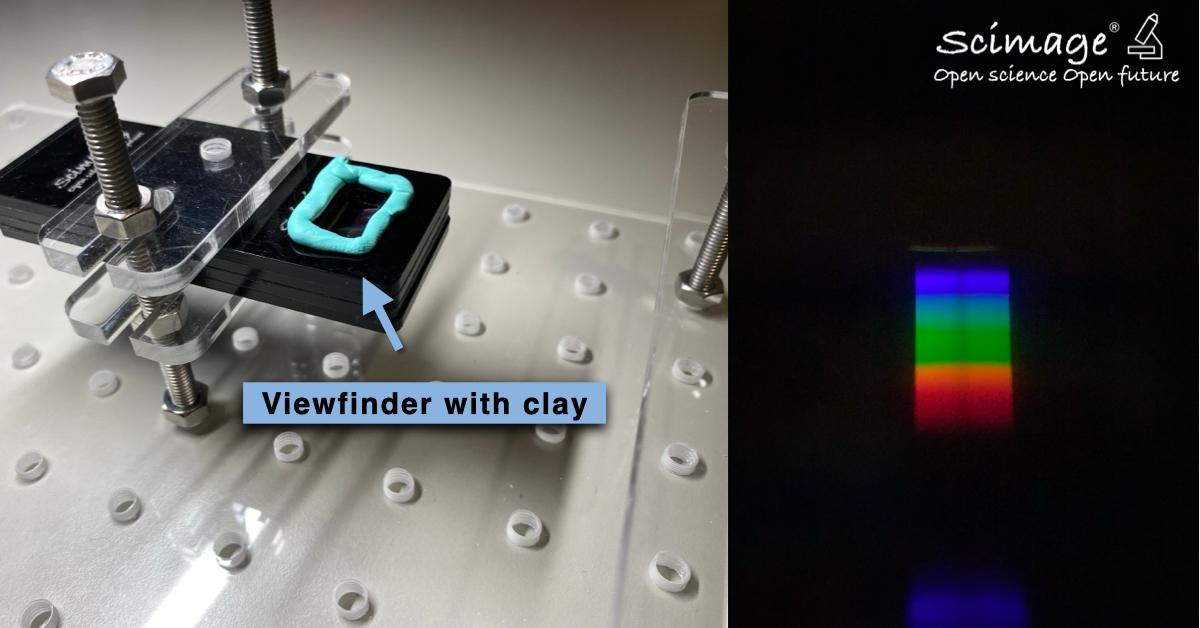
When using, shape the putty in a front-low, back-high form to eliminate the bright line at the front when shooting spectra (this method was organized by Teacher Prohamer Liao and shared by Teacher St chiu).
(2) Overexposure
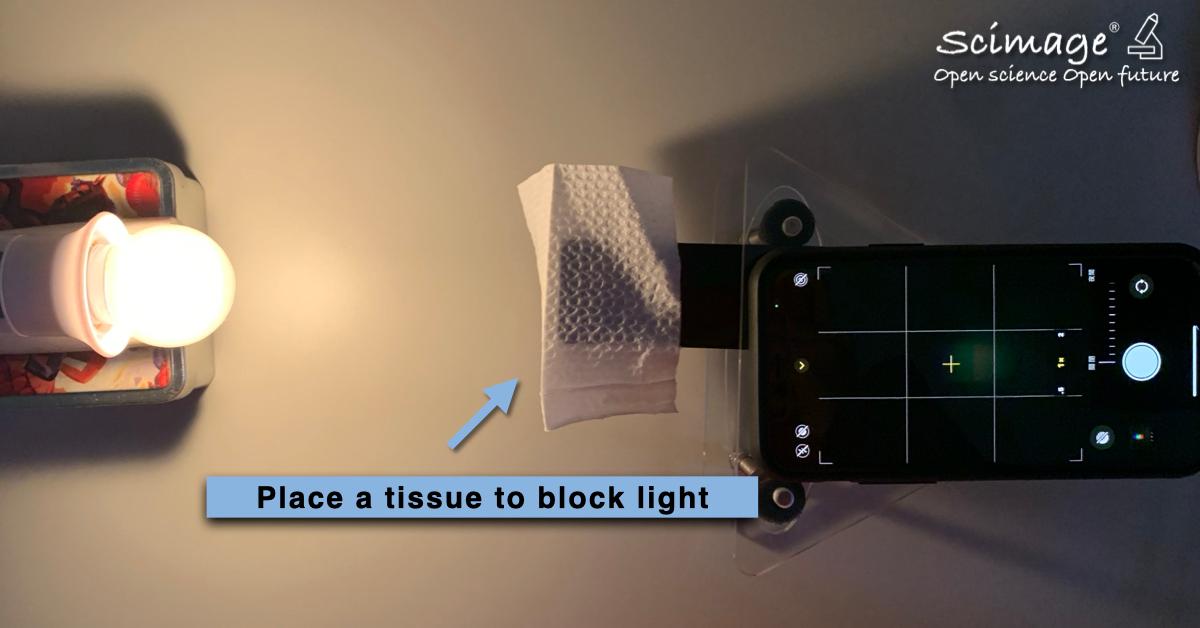
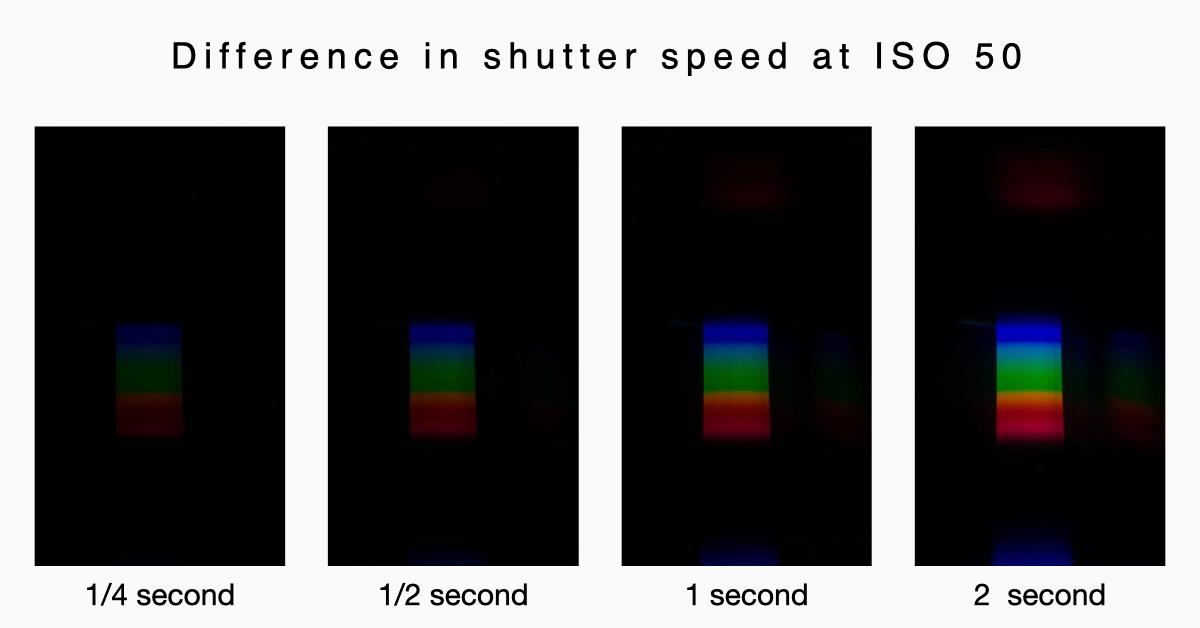
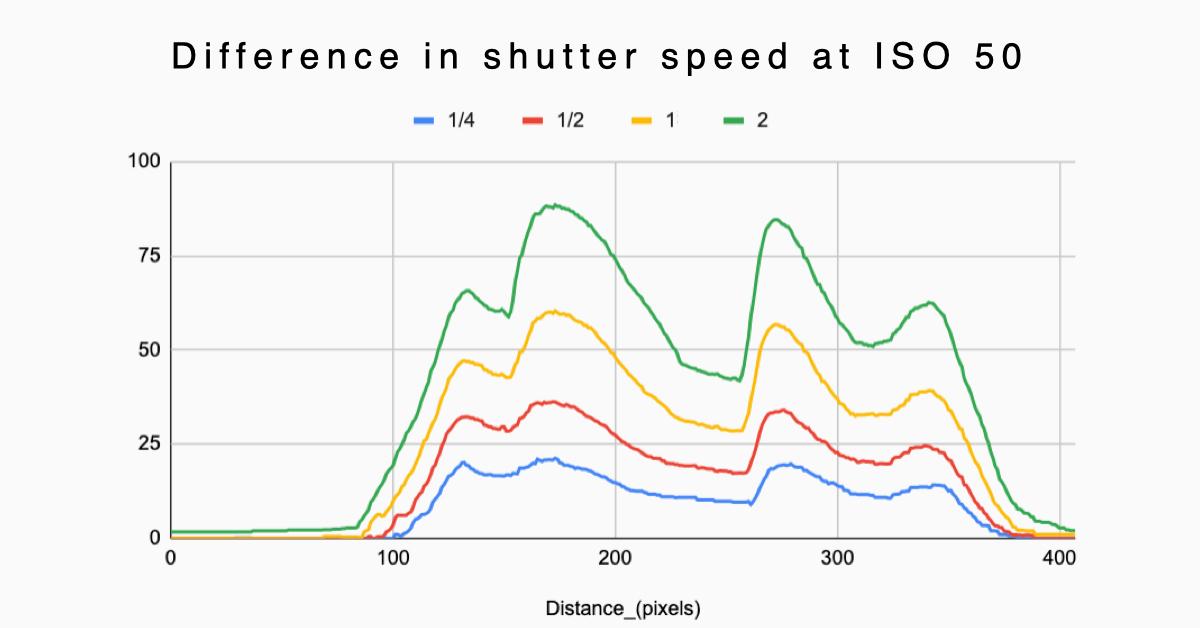
When first using it, you may not understand the spectrometer's requirements for light source intensity. In fact, only very weak light is sufficient. When shooting, overly intense light sources can cause overexposure, where light of a certain color may overwhelm other spectral lines, affecting numerical analysis.
If you cannot increase the distance from the light source, besides manually adjusting the phone's photography settings, you can also use light-diffusing items like tissue paper, light-blocking sheets, or diffuser sheets, placing them in front of the slit (small gap) to effectively reduce overexposure.
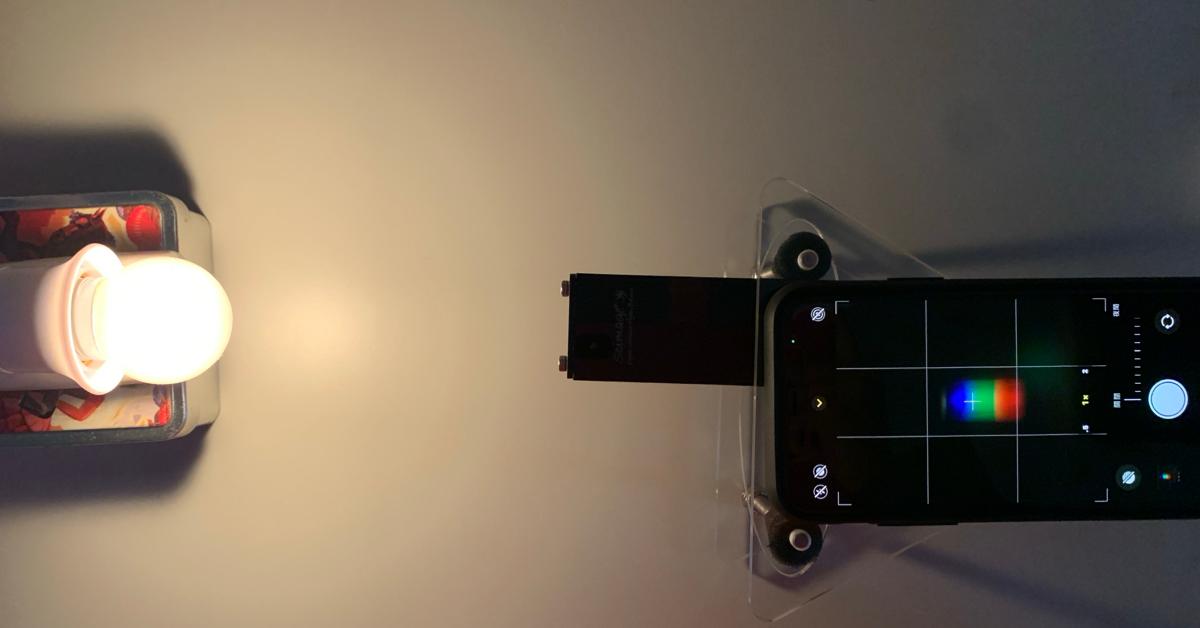
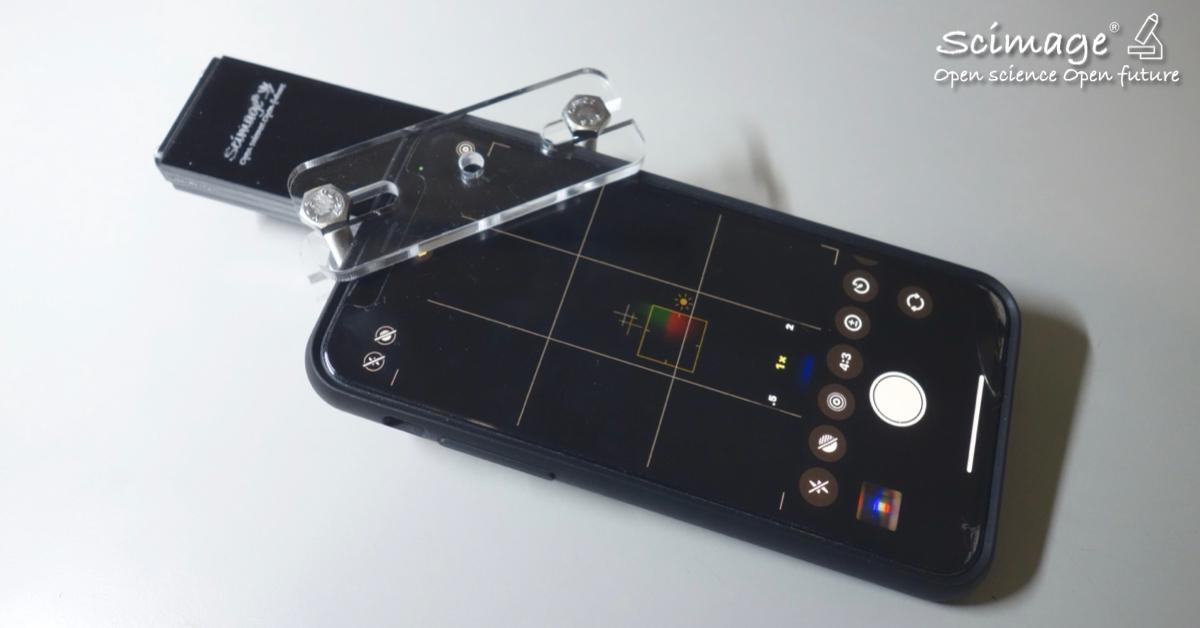
(3) Shooting Angle
For pure recording purposes, shooting angle doesn't matter much, but if you want to put it into ImageJ for analysis, try to keep the spectrum perpendicular to the frame to reduce subsequent adjustments. When shooting, you can turn on the phone's auxiliary function 'grid lines'. When fixing the phone, you can clearly see whether the frame is horizontal or vertical, allowing for quick adjustments to avoid taking many photos that end up unusable.
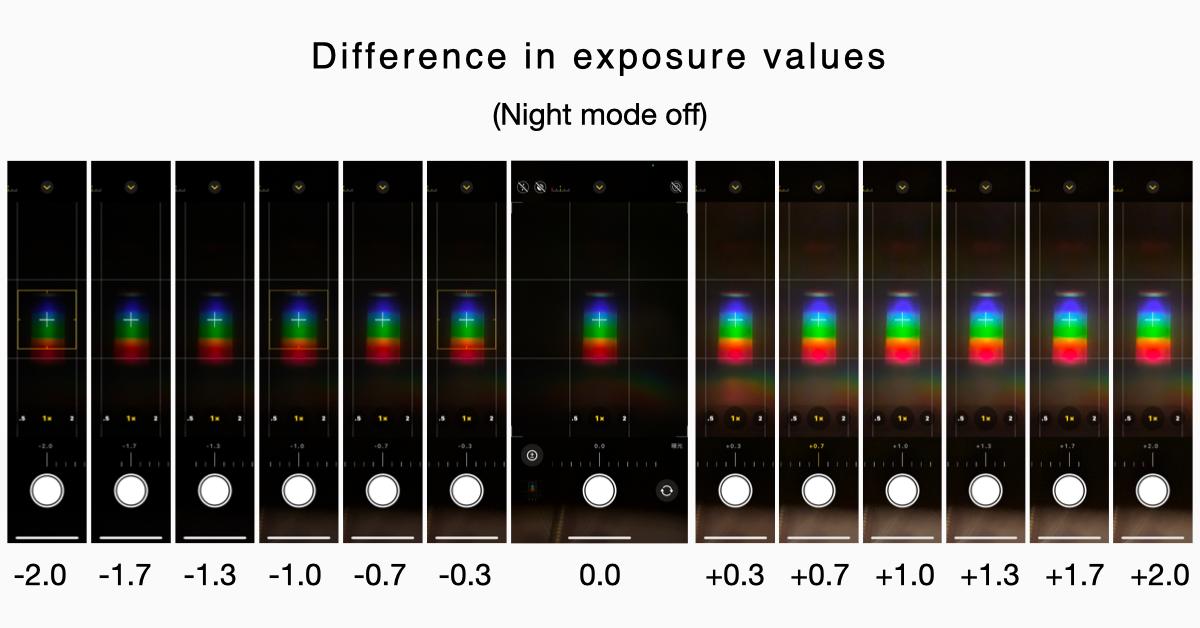
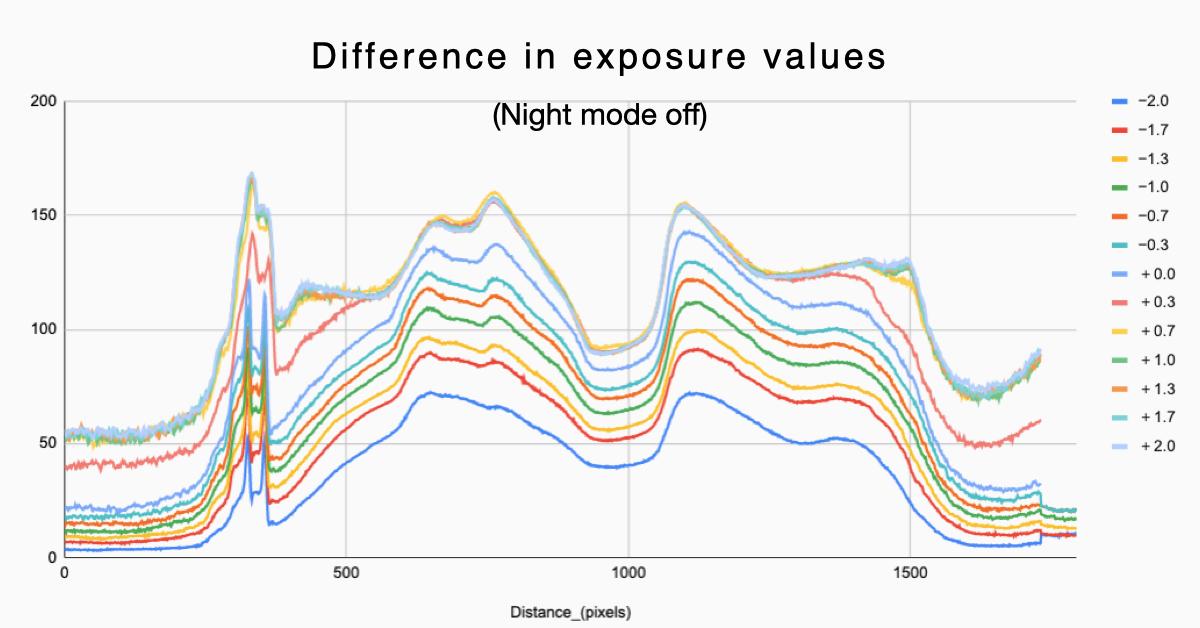
(4) Adjusting Settings
Photos taken with different light source intensities will also show differences during analysis. Below is a comparison of values for different exposure settings and adjustment methods for two phone systems.
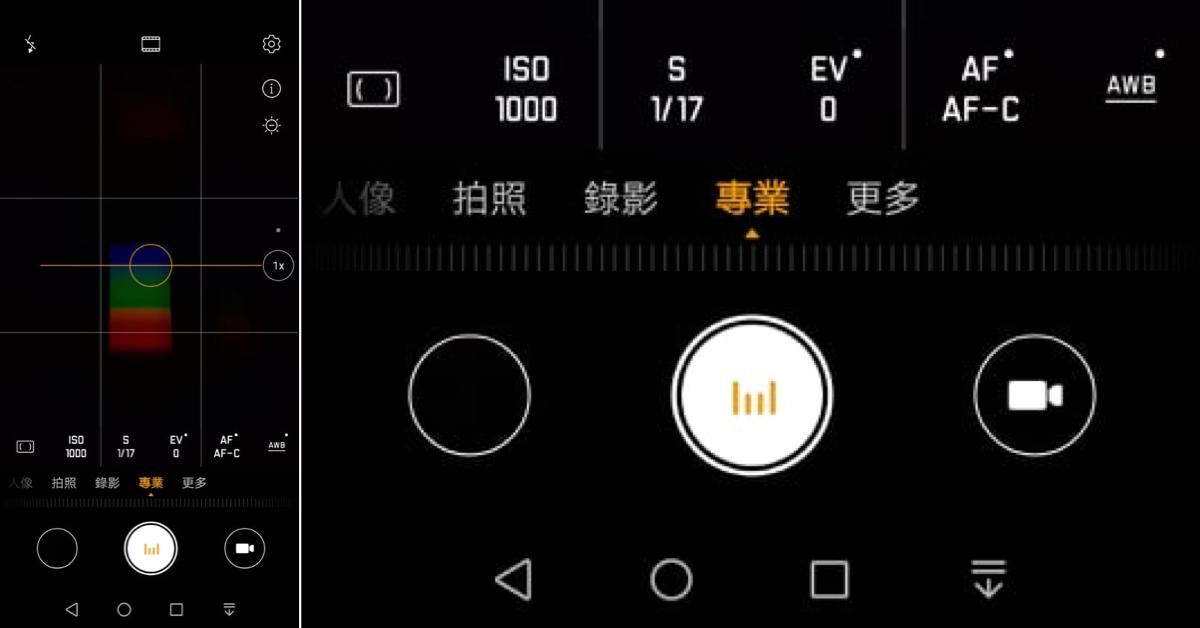
01. Android System
Since there are so many Android system phones, this section can only provide a brief explanation. For actual operation, please refer to the user guides of each phone manufacturer.
Open the camera function and find the location where you can control 'exposure', 'brightness', and 'ISO'. Sometimes these options are in the camera's 'professional mode' or in the camera's 'settings'. Some phones can only roughly adjust large ranges of values, while others can adjust to very fine numbers, with limitations varying by phone model.
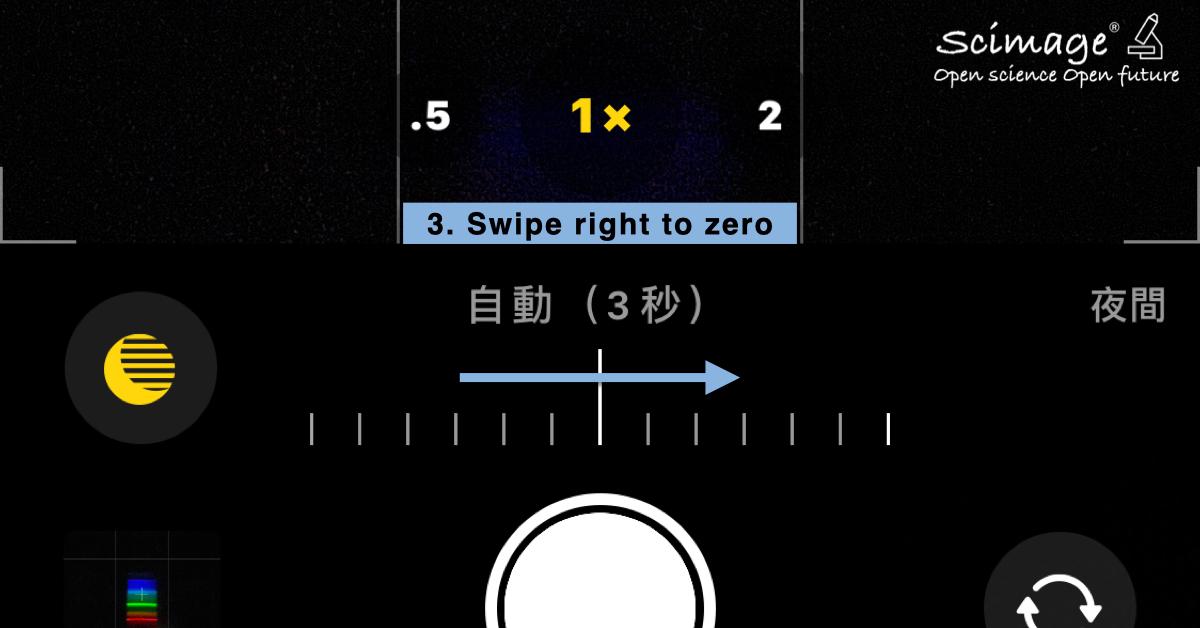
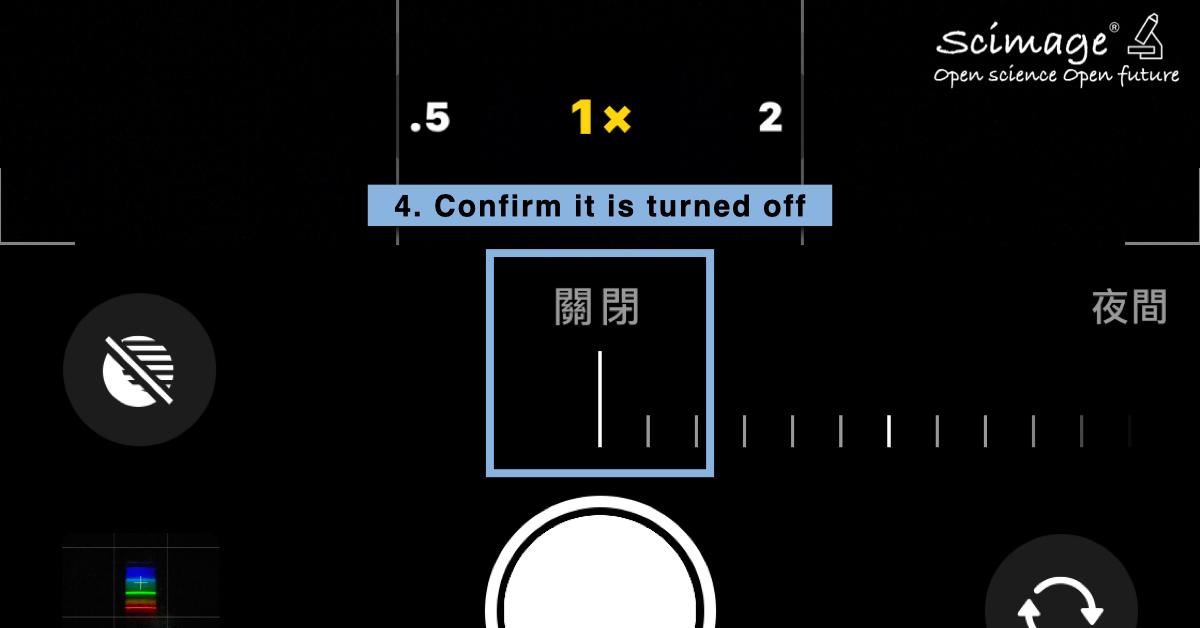
02. iOS System
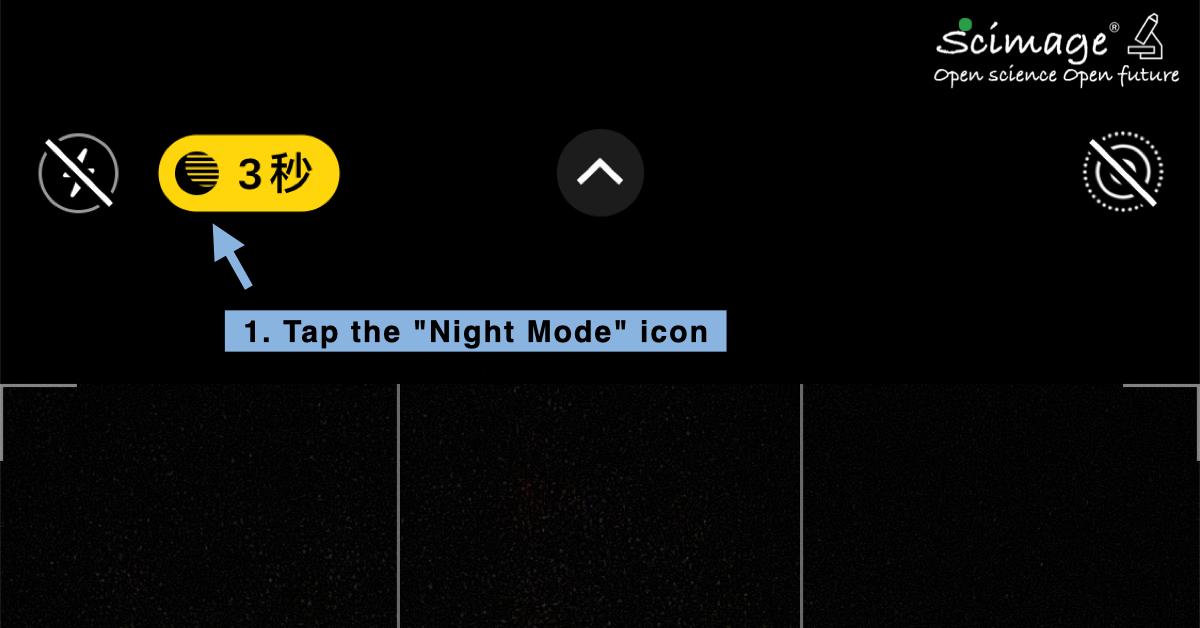
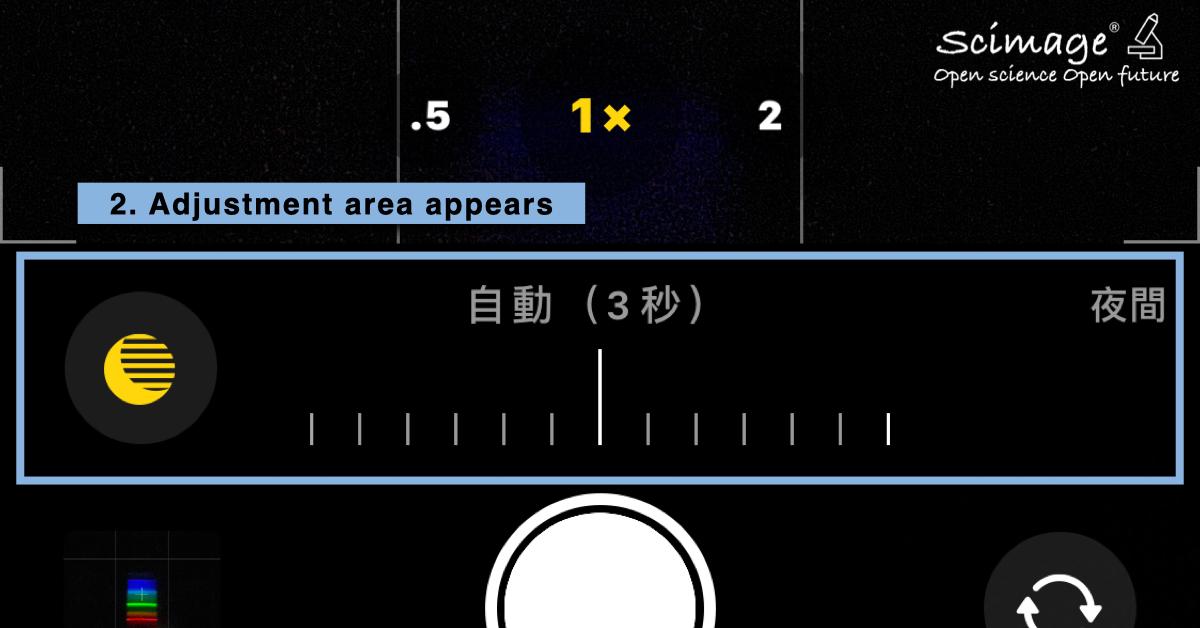
Open the phone's camera function, turn off 'Night Mode' (skip this step if not available), then place the phone on the smartphone spectrometer's viewing window, and adjust the 'brightness' and 'exposure' values according to the light source intensity.
(5) Difference Between Phone Screen and Actual Photo
Different phones have different lens designs. For multi-lens phones (single, dual, or triple lens), each lens has different functions and characteristics, with varying light sensitivity. Some have 'macro function', others have 'wide-angle function'. When using a smartphone spectrometer, you generally choose the 'main lens', which is usually the normal magnification lens or the one with the clearest imaging.
Phones that claim to be 'camera phones' or use built-in features like 'True Tone', 'Night Shift', or 'Eye Protection' (which make the screen appear yellowish) will also make the screen look different. Not to mention screen protectors like 'blue light filter screen protectors' or 'privacy screen protectors' - all of these will affect the difference between what you see when taking the photo and the actual shooting result.
After reading about the above differences, don't worry too much. As long as you use the same phone and the photos taken are not overexposed, they basically have reference value.
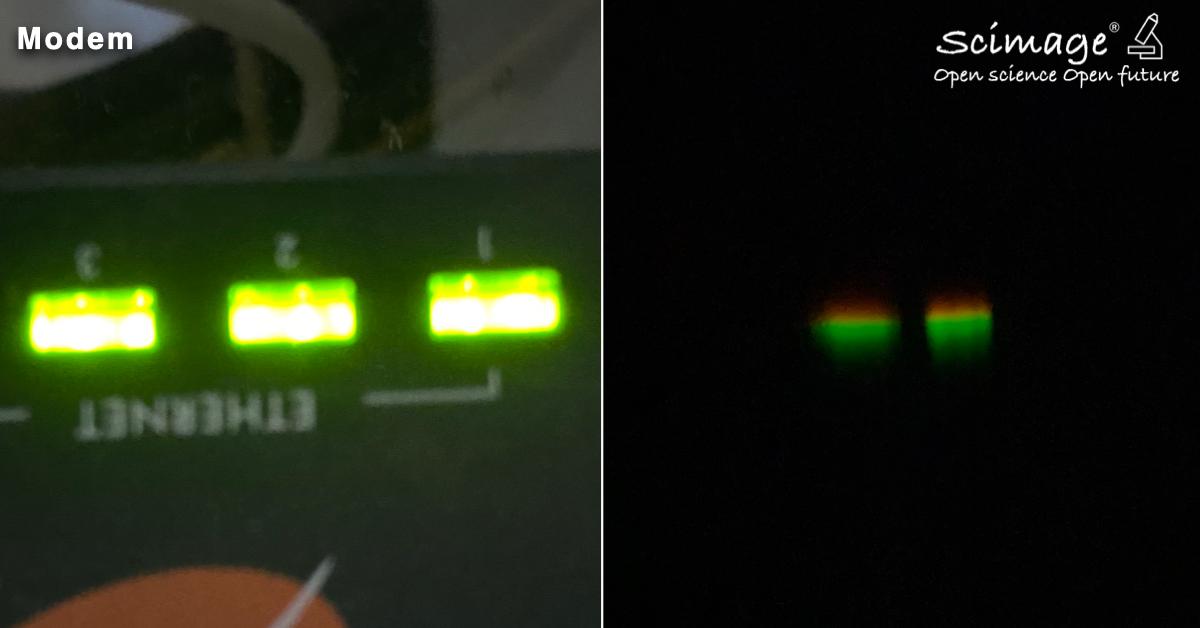
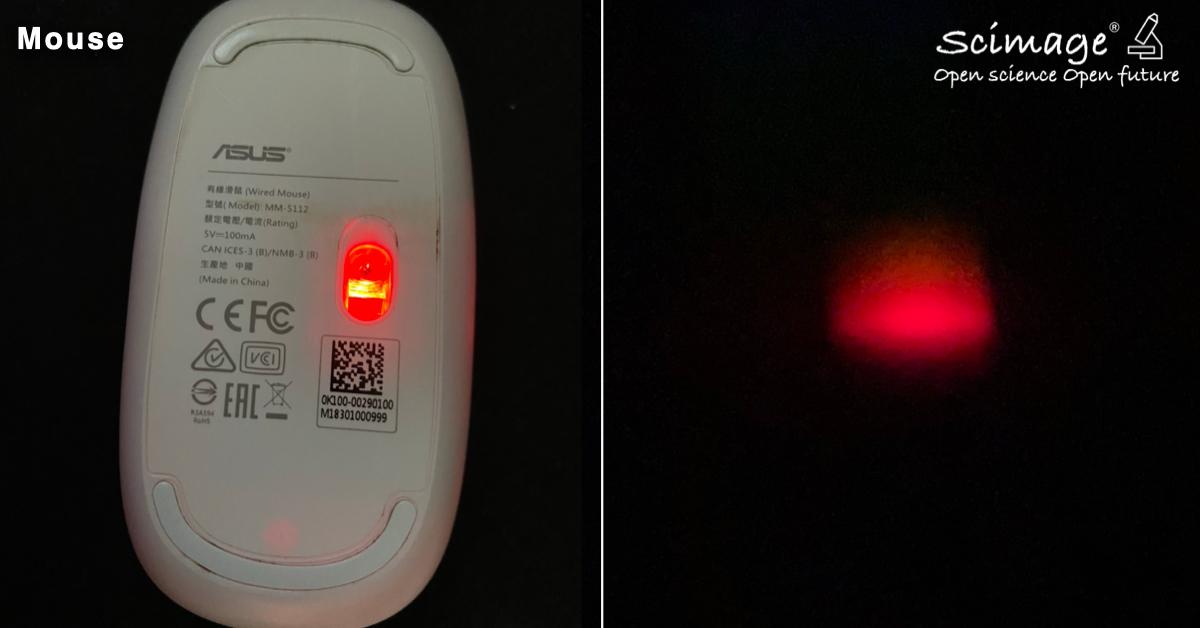
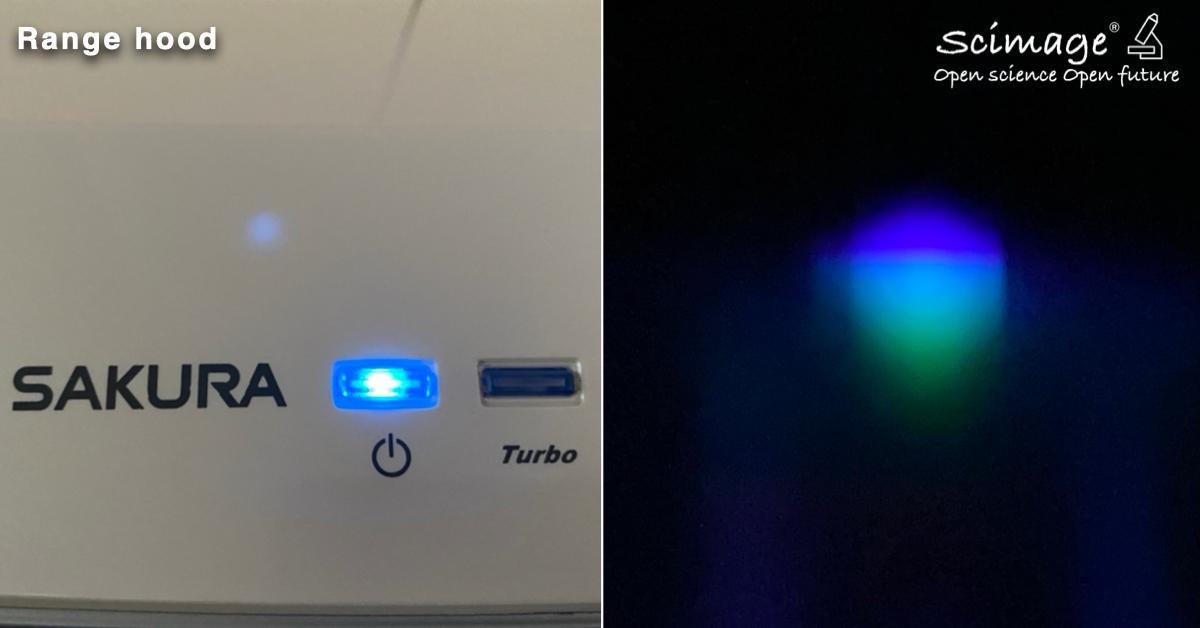
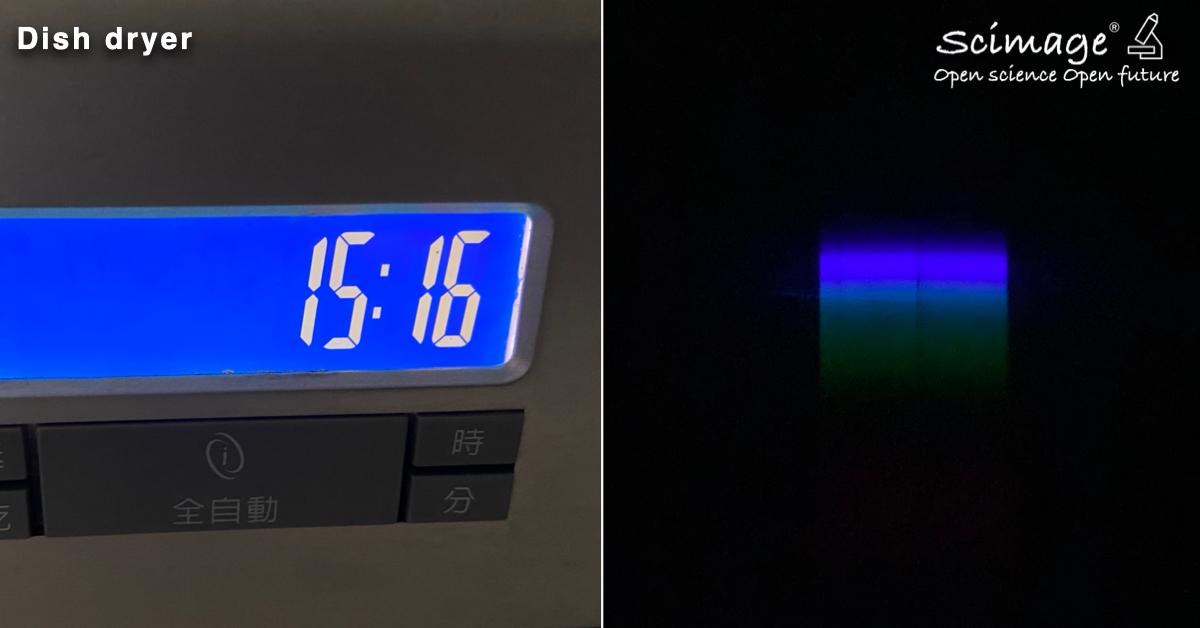
III. Try It Out
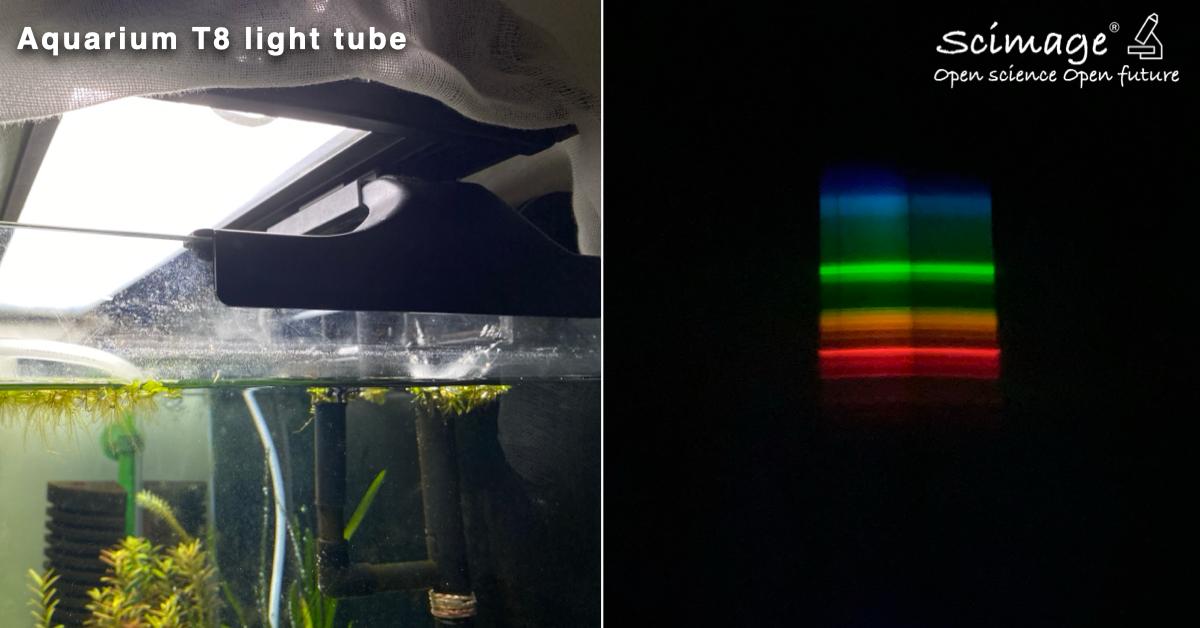
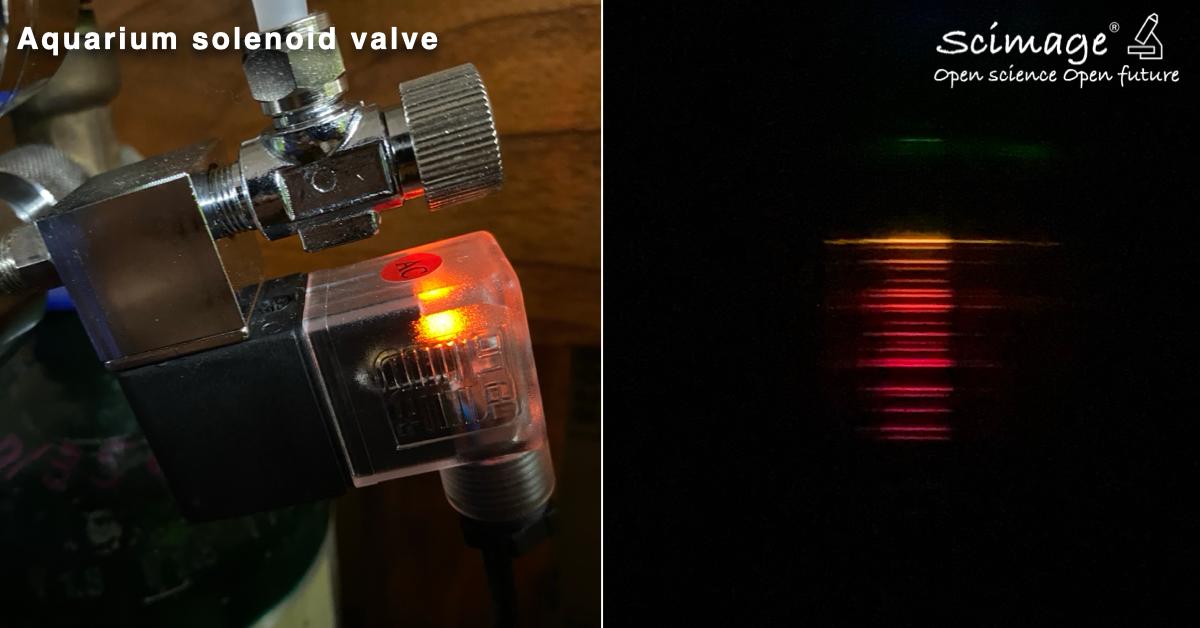
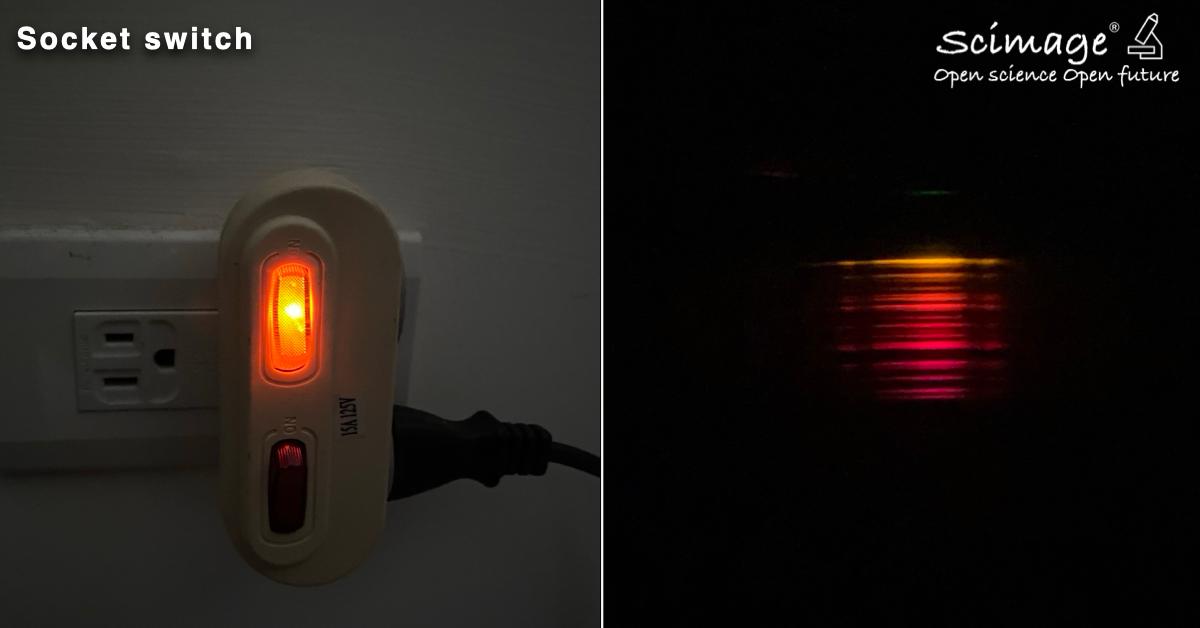
Look around your room or home for any glowing items, take photos to see what their spectra look like - you might discover something unexpected.